Search This Blog

Latest post

Vegan Meatlover's Pizza

Showing posts with label dessert. Show all posts

Friday, December 25, 2020

Easy Cinnamon Sugar Doughnuts

Christmas morning is a delight to kids. Waking up to delicious treats, presents, and spending the day with family can be a lifelong memory. However, it can be quite a stress on parents who have prepare and host an entire meal. These cinnamon sugar doughnuts are a delicious and easy breakfast idea, especially for the holidays! 

Cinnamon sugar doughnuts served with a home made chocolate sauce


1 package Pillsbury homestyle biscuits (accidentally vegan)
2 cups canola oil (or neutral oil of choice)
2 tbsp cup cinnamon
1/2 cup cane sugar 


1. Bring a pot of oil to medium heat. Open the Pillsury biscuts and use your fingers to poke a hole in them. 

2. Shape the dough so that a large hole is formed in the middle. Make sure that the hole is slightly larger than you intended, since it will shrink as you fry the donuts. 

3. Gently place your doughnuts into the oil and fry on each side for about 3-5 minutes or until golden brown. 

4. Set aside the doughnuts on a paper towel to remove excess oil, and let cool for about 5 minutes. 

5. In a wide bowl, mix your cinnamon and sugar. Then dunk each doughnut in to the cinnamon and sugar mix until completely coated. 

6. Serve with icing, chocolate, or however you like. Enjoy!

Thursday, December 24, 2020

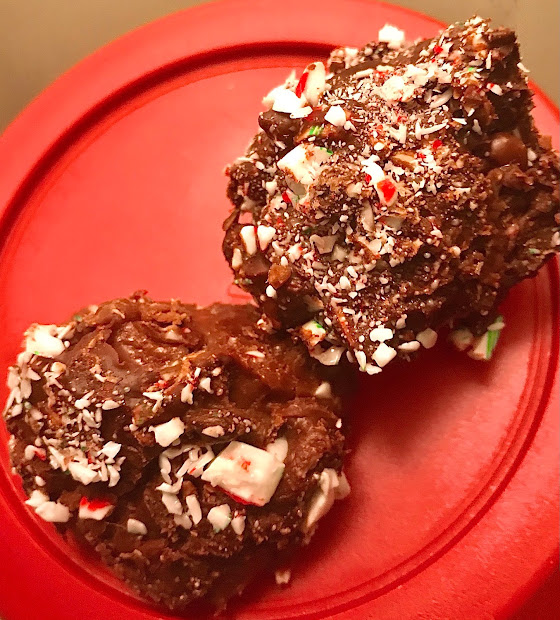
Chocolate Peppermint Truffles

 During the Halloween season, I had made these delicious little peanut butter chocolate truffles that definitely sates one's sweet tooth. I find vegan chocolate or candy to be a little hard to find, especially when I crave them during various festivities. So I make my own! This is a recipe for chocolate peppermint truffles. 


Chocolate peppermint truffles ready to be served for the holidays


1 cup vegan dark chocolate chips 
3 candy canes or peppermint candies 
1/2 cup milk (I used oat milk)
1 tbsp butter (I used Earth Balance)
1 cup confectioner's sugar

1. Bring a sauce pan to medium low heat and add milk. Stir for about a minute until it gets warm. 

2. Add 2 out of your 3 candy canes, broken up and let them dissolve (breaking them up will help them dissolve faster) 

3. Continuously stir. Once the candy canes have dissolved completely, pour in half of your dark chocolate chips. 

4. Stir the dark chocolate chips until fully combined with the milk.

5. Slowly pour in your confectioner's sugar (to make this at home, use equal parts granulated sugar, corn starch, and blend until powdered). 

6. Once the confectioner's sugar is fully combined, the chocolate mixture should be quite thick. Pour into a container or place the sauce pan in the fridge for a couple hours. 

7. Once the mixture has been in the fridge, it should be moldable with your hands. Roll up the mixture into 1-inch balls. and set in the freezer to cool for about 20 minutes. 

8. In the meantime, smash your third candy cane until it turns into small particles.  Melt the rest of your chocolate chips in the microwave. 

9. Prepare a station to dip the truffle balls into the chocolate and peppermint shards. 

10. Once the balls have cooled, dip them in the melted chocolate and subsequently in peppermint shards. Place them on a sheet of wax paper and put them in the fridge. 

11. Once the truffles have been in the fridge for a few minutes, the chocolate will have hardened and it will be ready to serve. If you are saving it for later, feel free to cover them with wax paper, place them in a container, and remove before serving. Enoy!

Monday, December 21, 2020

Chocolate Peppermint Pastries

 Coming in with another delicious holiday dessert, great for Christmas dinner! These chocolate peppermint pastries are delicious, easy to make, and vegan! 


Chocolate peppermint pastries served with chocolate peppermint truffles for Christmas dessert

1 package Pillsbury crescent roll dough 
1 cup vegan chocolate chips 
1 tbsp peppermint extract
1 tbsp milk (I used oat milk)
2 tbsp butter
1/2 cup confectioner's sugar

1. Preheat your oven to 350℉. Roll out your pastry dough in a baking sheet and use a pizza cutter to cut the pastry dough into an even number of pieces. 

2. In a mixing bowl, melt your chocolate chips. Add peppermint extract, milk, butter, and confectioner's sugar. 

3. The mixture should turn into a thick paste. Use tea spoon to place a small mount on half of the pastry pieces. Be careful not to add too much, or the pastry will overflow while baking. 

4. Once half of the pastry pieces are filled, use the other half to cover each pastry individually (tip: paint the edges with water before covering the filling with the other pastry piece for them to stick better). 

5. Use a fork to crimp the edges of the pastries. Then place in the oven for 15-18 minutes. Let sit for 10 minutes and serve. Enjoy!  


Monday, December 7, 2020

Cheese and Jam Hand Pie

I was enjoying a charcuterie board when I came up with this recipe. I had a piece of cracker with some cheese that had mistakenly mixed with some fruit Jam that was on the board. The resultant bite was a delicious amalgamation of salty, sweet, and tart. I decided to make these pastries just to experience that delicious taste once again. 

Cheese and jam puff pastry; a salty, sweet filling that is delicious and great for dessert


1/2 cup fruit jam of choice (I used mixed fruit jam
1 package of vegan cream cheese
1 tbsp aquafaba (chickpea water) 


1. Thaw out your pastry sheet for about 30 minutes. Then open the pastry sheet and cut into 16 equal squares (4 columns and 4 rows). 

2. In the center of every other pastry square, place a small chunk of cheese and about 1 tsp of jam. Then brush the edges with some aquafaba. 

3. Cover each of the filled square with an empty one. then use a fork to press down and connect the two sheets together. 

4. Bake for approximately 15 minutes at 425℉. Let sit for another 15 and serve. Enjoy!

Friday, December 4, 2020

Chocolate Chip Brownies

 Being vegan does not mean you must deprive yourself of delicious food! I’ve come to the conclusion that you can substitute almost anything in a recipe to make it vegan. Such is the case with brownies. This is a delicious easy brownie recipe that is egg and dairy free! 


Brownies served with vegan vanilla bean ice cream


1 cup all-purpose flour 
1 cup sugar 
1/4 cup cocoa powder
1/4 cup canola oil 
1/2 cup milk (I used soy milk) 
1/4 cup vegan chocolate chips 
2 tsp baking powder
2 tbsp cornstarch

1. Pre-heat your oven to 350 and butter a glass pan. To prevent the brownie from sticking while baking.

2. Then mix dry ingredients into a bowl. Add your flour, sugar, cocoa powder, and cornstarch, and baking powder. Mix well until thoroughly combined and no lumps exist. (Feel free to sift them all if you want).

3. Melt about 75% of your chocolate chips. Create a whole in the center of the dry ingredients mix. Add oil, milk, and melted chocolate. Mix everything until we’ll combined. 

4. Pour into the baking dish and spread evenly. Sprinkle the top with the rest of your chocolate chips. 

5. Bake for 20-30 minutes (use the toothpick test to see if it is done). 

6. Once it is out, let cool for 10-15 minutes, cut and serve with ice cream. Enjoy! 


Monday, November 30, 2020

Vegan Tiramisu

 One of my favorite desserts growing up was Tiramisu. Its creamy custard texture and soaked lady fingers are soft, refreshing, and decadent at the same time. Unfortunately, Tiramisu is far from vegan, so I devised some vegan substitutes to enjoy this dish once again. 


Vegan Tiramisu with homemade lady fingers and cocoa dusted on top.


For Filling:
1 package silken tofu 
1/2 cup aquafaba (chickpea water)
2 tsp lemon juice
2 tbsp corn starch
2 tsp vanilla extract 
 
For Lady Fingers:
2 cups all-purpose flour
2 tbsp corn starch
1 tbsp baking powder
1 tsp baking soda
1/2 tsp salt
1 cup sugar
1/2 cup canola oil 
1 tbsp apple cider vinegar
2 tsp vanilla extract 

For Espresso mixture: 
1 cup strong coffee or espresso
2 tbsp rum (optional)


1. Preheat your oven to 350℉. In a mixing bowl, add all the dry ingredients for your lady fingers and whisk gently. Then create a hole in the middle of the flour mixture to add your wet ingredients. 

2. Add your wet ingredients and slowly mix the batter until fully combined. Then grease a baking sheet thoroughly and pour your batter onto it to create a very flat cake. Bake for approximately 30 minutes (do the toothpick test to see if it done before removing it from the oven). 

3. Once the lady fingers cake has been baked, set aside to cool completely and take this time to make some strong coffee or espresso. Then place in the fridge to cool after pouring in some rum. 

4. While your cake and coffee are cooling, it is time to work on the cheese filling. Tiramisu is traditionally made with a mascarpone custard. To substitute this, whip 1/2 cup aquafaba until foamy. 

5. Then add your aquafaba to a blender along with a package of silken tofu, vanilla extract, and corn starch. Blend until completely mixed. 

6. Pour the filling into a sauce pan and cook on low heat heat until it begins to slightly thicken. Do the finger test to see if it is complete: stir the sauce with a spoon and then immediately trace a line across the back of the spoon with your fingertip. If the line stays then it is the correct consistency. 

7. Pour the filling into a mixing bowl and cover with plastic wrap to prevent a skin from forming. 

8. It is now time to assemble your cake. Cut your cake into long rectangular shapes to be your lady fingers, about 1-2 inches wide. Dunk them quickly into your espresso mixture and arrange them in a baking dish. Only dip them in for about 2 seconds or so, or the lady fingers will disintegrate. 

9. Once the lady fingers are arranged. Pour your thickened custard over them. Use a spatula to level the custard and cover the dish. Place the dish in a refrigerator for the cake to set overnight or for at least 5 hours. 

10. Dust the surface with cocoa powder. Then feel free to cut and serve. Enjoy!  

**Note: Feel free to make multiple layers, alternating soaked lady fingers with filling, if you would like. 


Friday, November 27, 2020

Vegan Caramel Pecan Tart

This caramel pecan tart is the perfect dessert for the holiday season. It requires no tart pan and has very little prep. This was definitely a hit in my household! 


Easy caramel pecan tart with no tart pan required.


1 sheet store-bought puff pastry (Pepperidge Farm puff pastry is vegan-friendly!)
1/2 cup halved pecans
1 cup sugar
1 tbsp butter
1 cup milk or cream (I used oat milk)
2 tsp cinnamon
1 tsp nutmeg
1 tbsp corn starch
1 tbsp aqua faba (chickpea water)

1. The first step of this tart is to thaw your puff pastry if it is right out of the freezer. Let your puff pastry thaw for approximately 30 minutes, or until you can unfold it. 

2. For the filling, bring a pot to medium-low heat and add 1 cup of sugar. Continuously mix the sugar until it melts. Ensure to use a wood wooden spoon as your utensil, as a plastic spoon will melt and a metal spoon can induce sugar crystallization.

3. Add your butter and continue to mix. Be careful as the butter will make the melted sugar bubble and it might sputter a little. Melted sugar is extremely hot and can cause very painful burns. 

4. Once the butter has been incorporated, add milk and continue to mix. The concoction will continue to sputter and bubble up, so continue to be careful. 

5. Once the milk or cream has incorporated, add your cinnamon and nutmeg. Bring the pot to low heat and continue to stir. 

6. Create a corn starch slurry (equal parts corn starch and water) and add to your sauce. This will help thicken the caramel sauce. 

7. Once the sauce has thickened, add your pecans to the caramel sauce for about 2 minutes. This will complete your filling 

8. Spread the filling on to the center of your puff pastry, and fold over the edges of the pastry. Then spread aqua faba over the edges. this will serve as your egg wash 

9. Bake the tart at 400℉ for 15 minutes. Remove from oven and let cool for another 10-15 minutes, then serve. Enjoy!


Monday, November 9, 2020

Vegan Rice Kheer

Unfortunately, traditional Indian sweets and desserts tend to not be vegan. One of my favorite Indian desserts was Kheer, a rice pudding made traditionally with ghee, milk, sugar, and spices. Here is a vegan version that is just as delicous as the original! 


Rice Kheer with toasted almonds


1 cup Basmati Rice 
2 cups oat milk or coconut milk 
2 tbsp cashews or almonds
2 tbsp vegan butter 
1/4 cup sugar 
2 tsp cardamom
1 tbsp raisins (optional)
1/2 tsp saffron (optional for color) 


Bring a saucepan to heat and add 1 tbsp of butter. Add cashews (or almonds) and let them sautee in the butter until they are golden brown. Pour them out and set them aside in separate container. Then add the other half of the butter as well as the rice. Toast the rice in the butter until it becomes fragrant. Then pour in the milk, add the raisins, and let it boil for approximately 15-20 minutes in medium heat (do not set the heat too high or it will boil over). Then add in your sugar, cardamom and saffron. Mix well and add the nuts back into the batch. Enjoy!

Monday, November 2, 2020

Easy Peanut Butter Chocolate Chip Cookies

I do know there is a stereotype that vegans are constant health freaks and only eat healthy fruits and vegetables. While a vegan diet is healthy in many ways, it doesn't mean we don't have our junk food or food we eat for enjoyment. These homemade cookies took only 15 minutes to make, including baking time! 


Peanut butter chocolate chip cookies with a glass of chocolate soy milk on the side

1 cup peanut butter
1 cup flour 
3/4 cup sugar
1/2 cup milk (I used soy milk)
1 tsp vanilla extract 
2 tbsp vegan chocolate chips 
1 tsp baking powder 

Preheat your oven 375°F. In a mixing bowl, mix your peanut butter, milk, and vanilla extract. Then add your flour, sugar, and baking powder to ensure that the wet and dry ingredients are mixed thoroughly. Once everything is mixed, add the chocolate chips and place on a greased or lined baking tray. Bake for approximately 8-10 minutes, and let sit for another 5 minutes to cool down and continue cooking. This way, the cookies are soft and gooey when you take a bite into them. Enjoy and let me know in the comments below what you think!

Wednesday, October 28, 2020

Pumpkin Pie Cheesecake Bites

Like many people this time of year, I become obsessed with pumpkins - pumpkin spice lattes, pumpkin bread, and pumpkins, themselves. The warm flavors of cinnamon and nutmeg grow in popularity as the cold weather falls upon us. Not to mention that the east coast is painted with the colors of yellow, orange, purple, and red. Most pumpkin desserts I see in the store unfortunately have eggs or dairy in them. This recipe was a delicious mix of a pumpkin pie and cheesecake. 


Pumpkin pie cheesecake bites served with vegan gingersnap cookies and vegan whipped cream

Crust: 
2 cups vegan gingersnap cookies
1/2 cup vegan butter 
1 tsp cinnamon 
1/2 tsp nutmeg
1/2 tsp allspice 
1/4 tsp clove
1/4 tsp ginger

Filling:
200 g raw cashews 
1/2 cup milk (I used cashew milk)
1/2 cup lemon juice 
1 cup pumpkin puree 
1 cup sugar 
1/4 cup corn starch 
1 tsp vanilla
1 tbsp cinnamon 
1 tsp nutmeg
1 tsp allspice
1/2 tsp clove
1/2 tsp ginger 


1. In a blender, grind up your gingersnap cookies. Then melt 1/2 cup vegan butter in the microwave. 

2. In a casserole dish (I used glass), mix graham crackers and butter. Then pat down into the bottom of the dish to create the crust and set aside. 

3. In pot, boil cashews for 15 minutes on low heat to soften them up (you can also soak them overnight). Blend cashews up, adding water slowly to help aid the process. 

4. Pour the cashew cream and rest of the milk into a mixing bowl. Add your lemon juice, pumpkin puree, and vanilla, and mix. Then add your spices, sugar and corn starch. Mix well until all the corn starch clumps are gone. 

5. Then pour the mix into the casserole dish and bake the cheesecake in a 350°F oven for 40 minutes (ensure that the center of the cake is not a liquid by poking it with a toothpick or fork - it may still require a bit more time). 

6. Once the cheesecake has baked, place in the fridge overnight for it to set. Cut the cheesecake into small bars for them to be bite-sized pieces and serve. Enjoy! 


Friday, October 23, 2020

Chocolate Peanut Butter Truffles

 With October in full swing, I definitely feel myself craving some Halloween candy. Unfortunately, most candies are not vegan. And the ones that are vegan are quite expensive. This recipe for chocolate peanut butter truffles is sure to satiate those chocolate cravings while also being plant-based, homemade, cheap, and delicious! 


Chocolate peanut butter truffles with white chocolate and a dark chocolate drizzle

Makes 10 truffles:
1/2 cup vegan dark chocolate chips 
1 cup peanut butter
1/2 cup powdered sugar
2 tbsp vegan white chocolate chips


In a mixing bowl, microwave the dark chocolate chips until most of them are melted (it took a minute and half for me). Add peanut butter and mix them together. Then slowly add the powdered sugar, mixing it little by little into the peanut butter chocolate concoction. Once the powdered sugar has been infused thoroughly, the mix should have a dough-like consistency (add more powdered sugar if need be). Shape the "dough" with your hands into balls and place on baking sheet. Place the baking sheet in the freezer for approximately 20 minutes. The truffle balls should harden. Once you remove them from the freezer. Melt the white chocolate chips and coat each ball in the white chocolate. Optional: if you have extra dark chocolate, feel free to melt and drizzle over the white-chocolate covered truffles.

Sunday, October 18, 2020

Mug Brownie

When it's that time of the month, I am definitely someone who crave chocolate. But I also know that I don't want to take 30 minutes to an hour just to have some dessert prepared. This mug brownie is decadent, fudgey, and definitely satiates my chocolate cravings. It is also one that doesn't break the bank! 


Mug brownie as a late night snack

3 tbsp flour
3 tbsp sugar
1 tbsp cocoa powder
1 tbsp nut butter (if not, use 1 tbsp neutral oil)
1/2 tbsp chocolate chips 
1 tsp baking powder
3 tbsp milk (I use soymilk)


1. In a large mug, first mix dry ingredients: flour, sugar, cocoa powder, baking powder, and chocolate chips. 

2. Then mix in wet ingredients: milk, and chocolate hazelnut spread (or oil if you wish to not use nut butter). 

3. Once mixed, Place in microwave for approximately 1 minute and 10 seconds. 

4. Remove from microwave and let cool for about 5 minutes. Eat with your favorite ice cream or by itself. 


.

Ginger Apple Crisp

 Coming in with another fall creation, but this time for dessert! This homemade ginger apple crisp is a great way to use up some of those apples you got while going apple picking. It's simple, delicious, and an inexpensive to enjoy a fancy looking dessert. 


Ginger Apple Crisp served with vegan vanilla bean ice cream

4 large apples
2 tsp cinnamon
1/2 cup sugar
1 tsp ginger paste (or fresh crushed ginger)
8 tbsp vegan butter (1 stick of regular butter)**
1/2 cup oatmeal 
1 cup all-purpose flour

1. In a small bowl, melt butter in microwave. Peel and core 4 apples, and cut into thin slices. in a baking dish or pan, mix half the butter, 1 tsp cinnamon, ginger paste, a 1/4 cup sugar. Then add sliced apples and mix together. 

2. In the bowl with the other half of the butter, add the remaining cinnamon and sugar. Then add in oatmeal and all-purpose flour.

3. Mix thoroughly and pour over the apples. Spread the oatmeal mix over the apples until they are covered. Then bake in a 350 F preheated oven for about 25 minutes. Once baked, let cool for about 10 minutes and serve with vegan ice cream. 


Followers